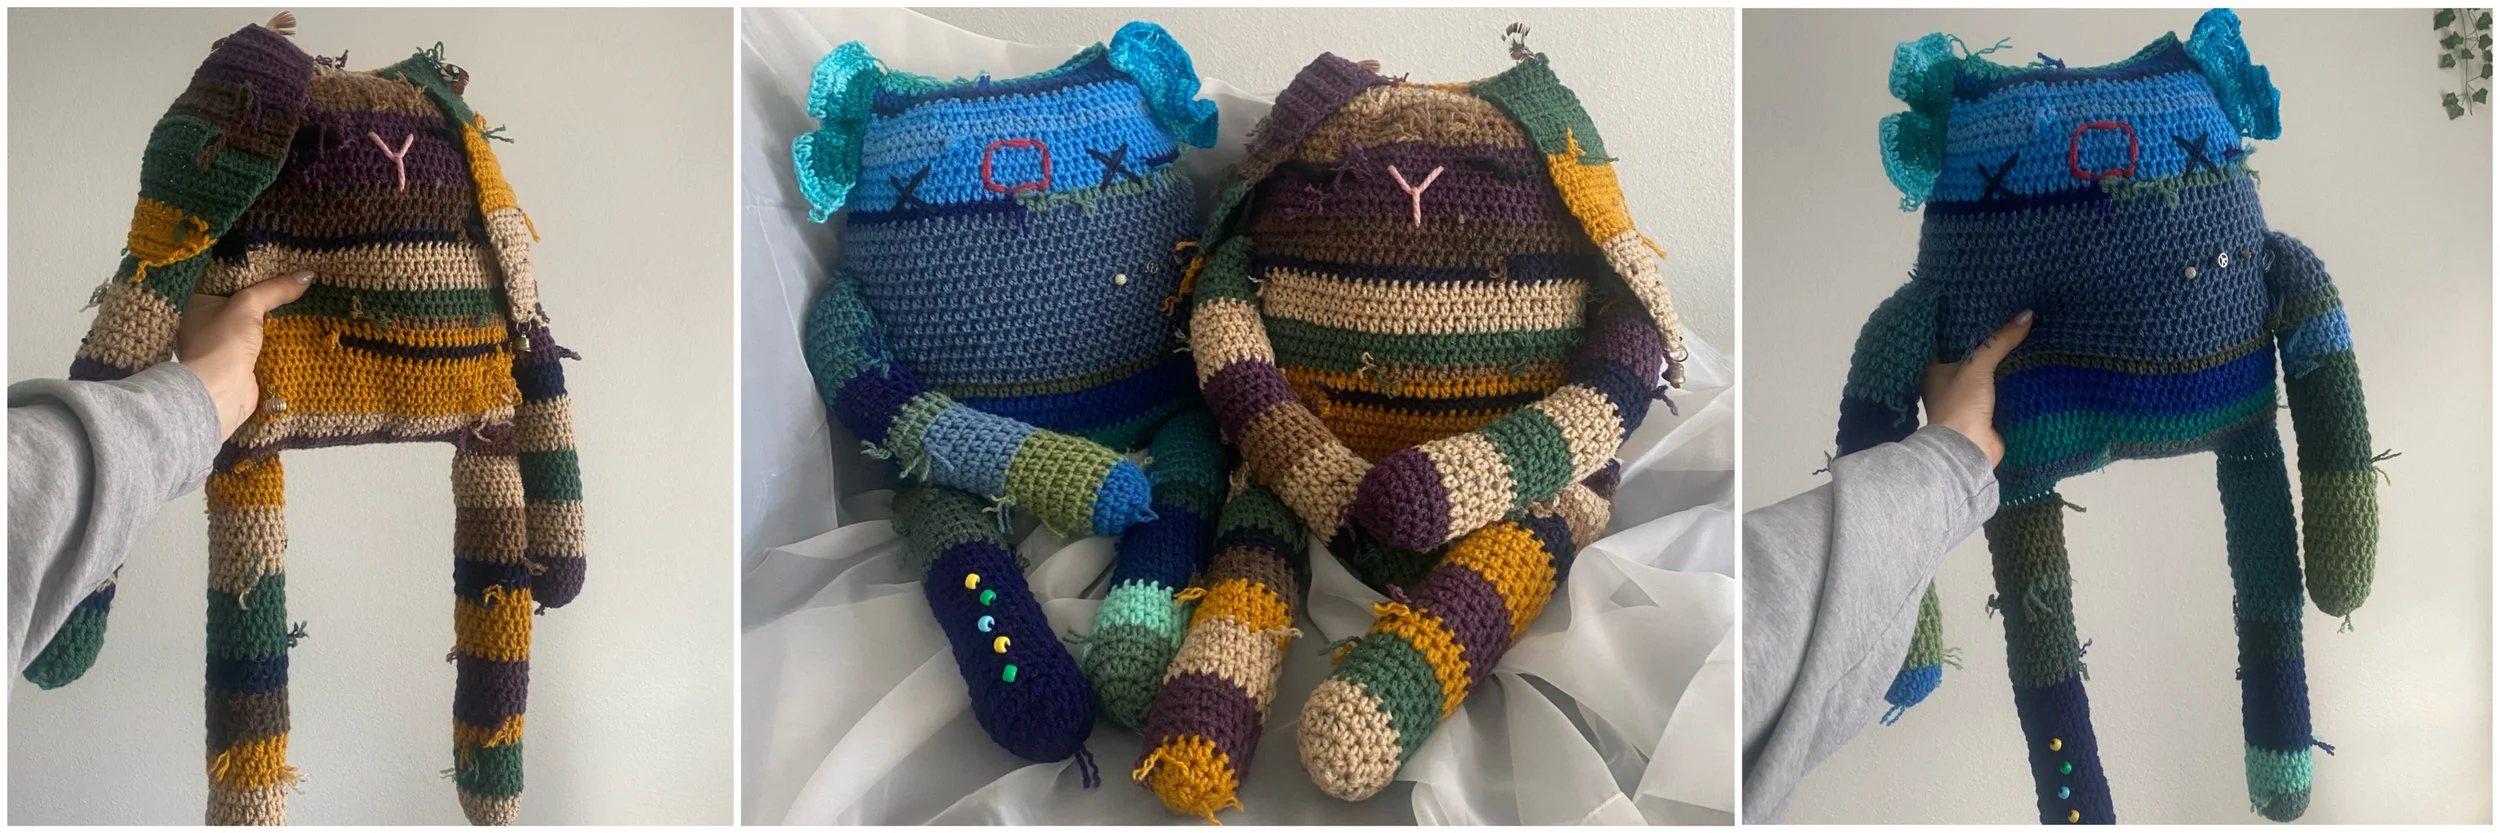
odds and ends — leftover friends ♡
♡ an autumn olive crochet original pattern by autumn olivia ward
please do not sell, copy, or claim this pattern as your own.
written in standard US crochet terms
you can get this as an ad-free PDF download
you may sell items made using this pattern! please credit me as the designer in your listings and include the link to this pattern.
@autumnolivecrochet on all socials, tag me when you post your creations!
youtube tutorial ♡ https://youtu.be/1Liz2VPdh_w
MATERIALS:
(example size uses 450g of weight 4 yarn and a 4.25mm hook, measures 28” head to toe)
- hook size 4mm with medium weight 4 yarn
- you can try it out with a 3mm hook with lightweight yarn or 5mm hook with bulky yarn
- scissors, yarn needle, and stitch marker
- buttons, safety eyes, or embroidery floss
- fiberfill, scrap ends, or stuffing of choice
♡
ABBREVIATIONS & TECHNIQUES:
- magic circle
- chain (ch)
- half double crochet (hdc)
- increase (inc) = 2 hdc into the same stitch
- decrease (dec) = hdc 2 together
- slip stitch (sl st)
♡
NOTES:
- if you can not do a magic circle you can chain 2 and work the entire first round into the second chain from hook
- all pieces are worked in continuous rounds meaning there is no slip stitch at the end of each round
- move your stitch marker (optional) up at the end of each round
- the design is meant to be no-sew but you may certainly use seaming if you wish
♡
TIPS:
- add spare beads or charms to your skeins before beginning
- use yarn or fabric scraps as stuffing
- tie color changes on the outside of the piece and fray them for an extra scrappy look
- add something heavy to each limb to create a weighted plushie (pennies, glass beads, pebbles, poly pellets)
- for facial features use surface crochet or embroidery, or buttons/safety eyes
noodle arms, hmmm… click to get the adventure time sweaters pattern
ARMS: make 2 (see legs for photo)
create a magic circle, chain 1
round 1: hdc 6 into magic circle (6)
round 2: increase into each st around (12)
round 3: [increase into first, hdc into next] repeat around (18)
round 4-30: hdc around (18)
[fasten off, add stuffing, set aside, they will be attached halfway through making the body]
♡
LEGS:
create a magic circle, chain 1
round 1: hdc 6 into magic circle (6)
round 2: increase into each st around (12)
round 3: [increase into first, hdc into next] repeat around (18)
round 4-30: hdc around (18)
[on leg 1, fasten off] [on leg 2, do not fasten off] [stuff legs]
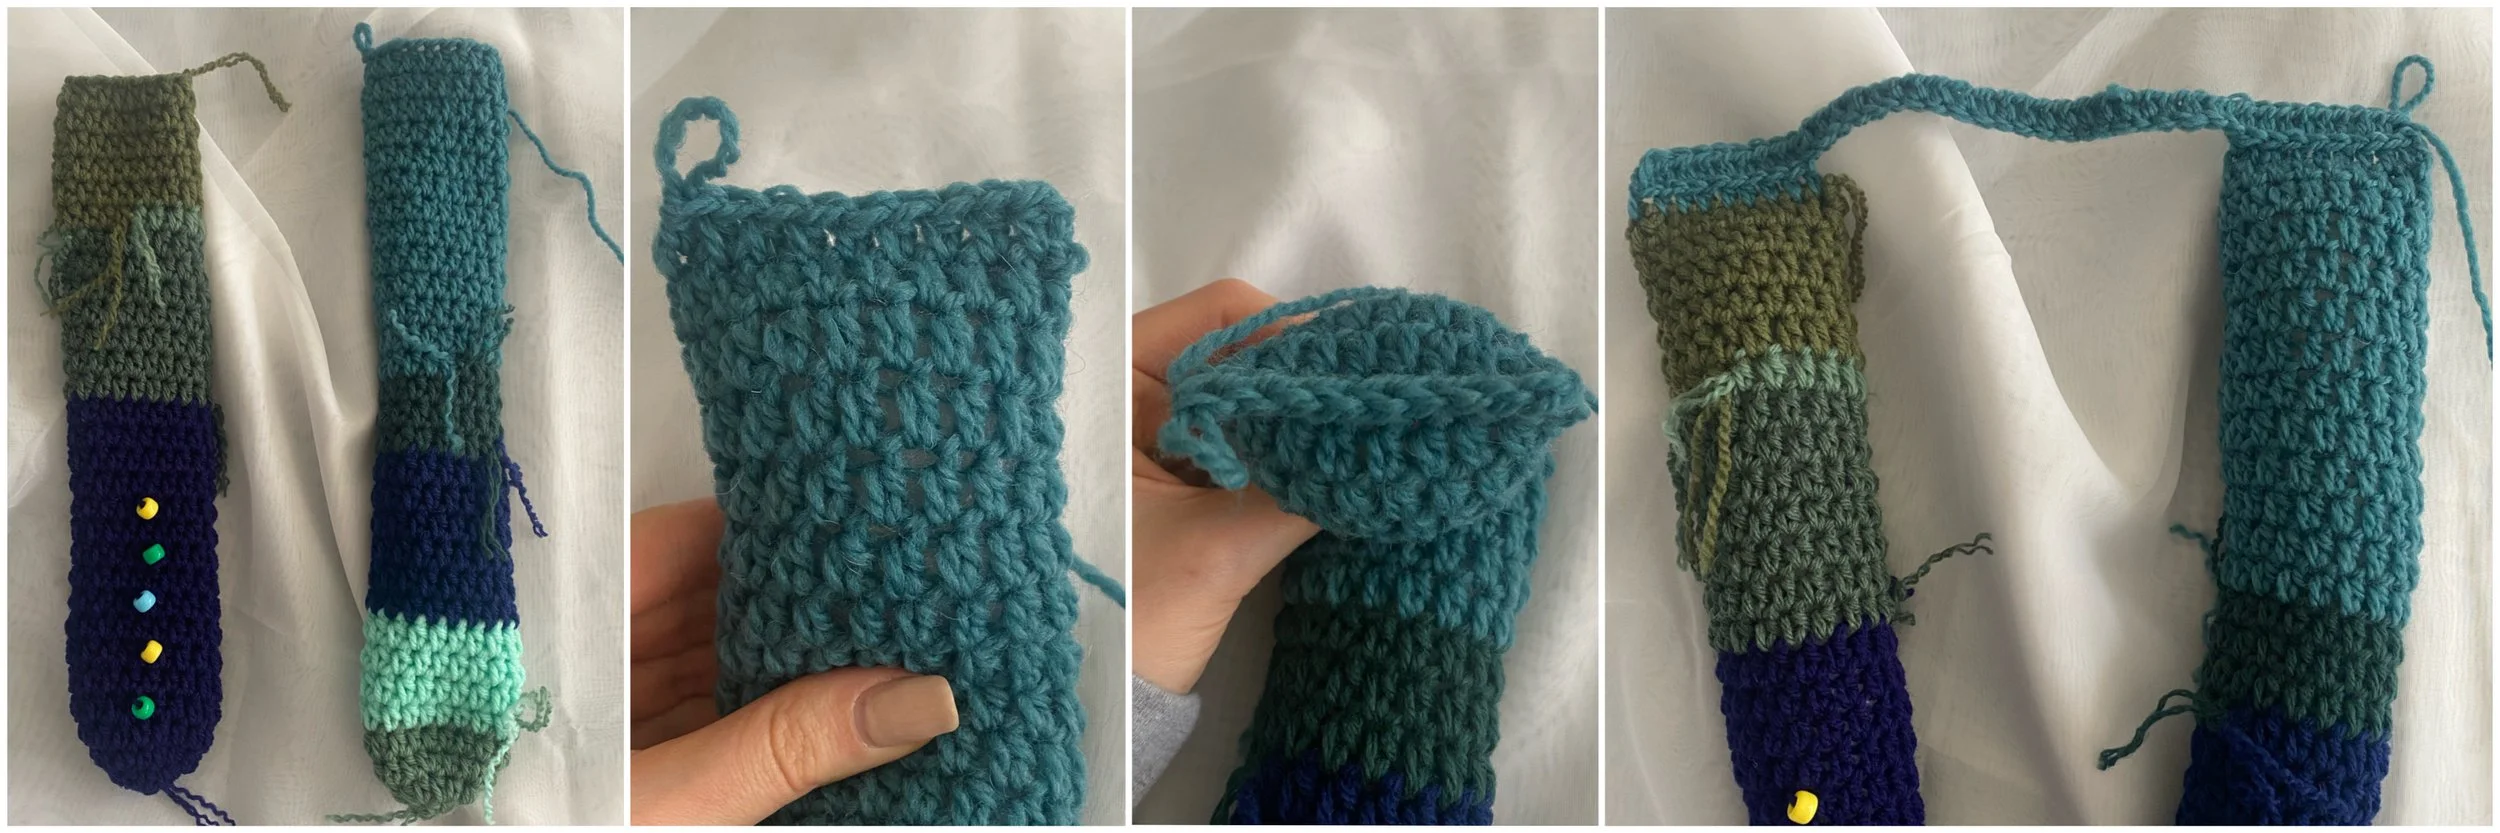
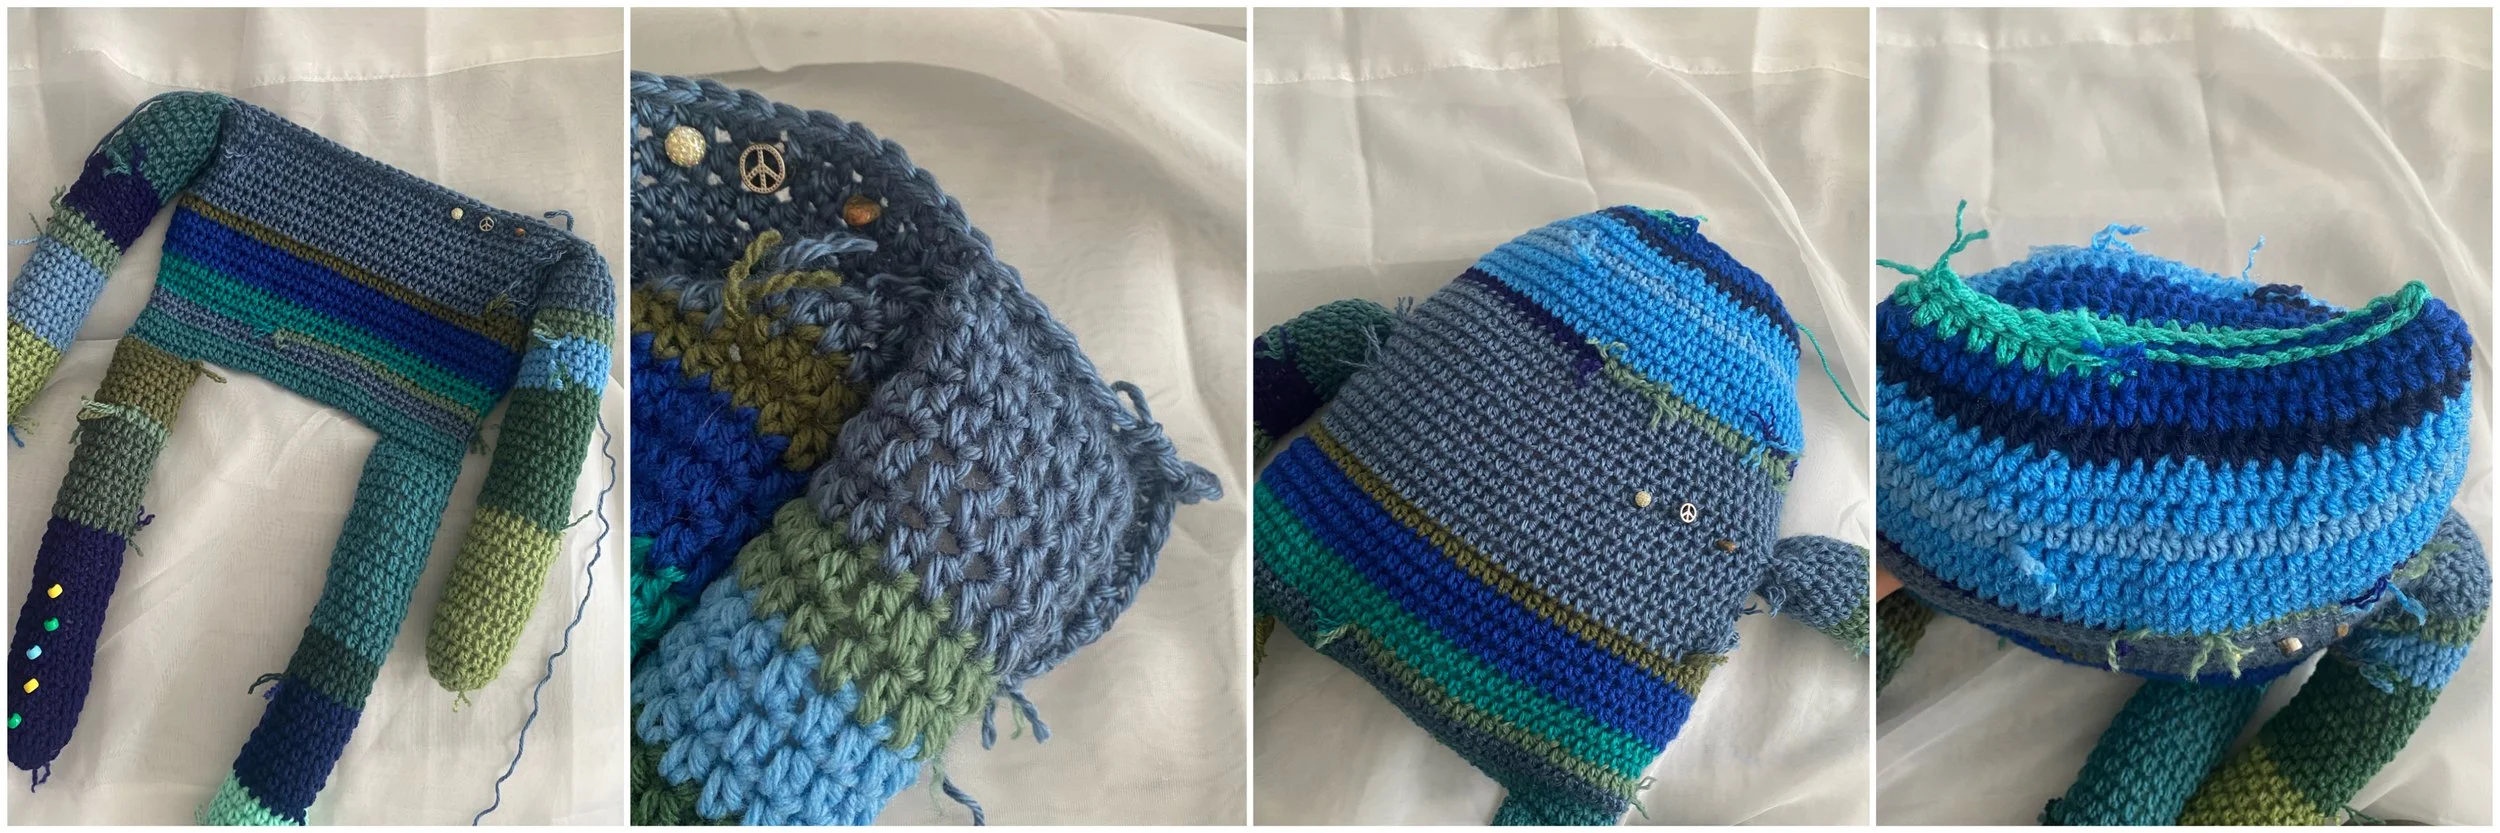
BODY: continued from leg 2
round 31: pinch the open end of leg 2 flat (9 stitches touching 9 stitches) work a hdc into each of the next 9 pairs of stitches to connect them, chain 22, then work another 9 hdc into the flattened leg 1 in the same way
continuing around; hdc into only the back loops of those 9 stitches, hdc across the chain of 22, hdc into only the back loops of the 9 stitches on leg 2 (80)
round 32-49: hdc around (80)
round 50: remove the last 4 stitches (the arms will be attached to the sides of the body, starting with the last 4 stitches of the previous row)
pinch one arm flat (9 stitches touching 9 stitches) and hold it flush with the body, attaching just like with the legs, this time working into ALL 3 stitches at once:
hdc into each of the next 9 stitches to connect the arm, hdc into the next 30, hdc into the next 9 to connect the other arm in the same way, hdc into the next 36 (80)
round 51-58: hdc around (80)
round 59: [decrease, hdc into next 6] repeat around (70)
round 60: hdc around (70)
round 61: [decrease, hdc into next 5] repeat around (60)
round 62: hdc around (60)
round 63: [decrease, hdc into next 4] repeat around (50)
round 64: hdc around (50)
round 65: [decrease, hdc into next 3] repeat around (40)
[add stuffing]
[pinch opening flat and work a hdc into each of the next 20 pairs of stitches to connect them, fasten off]
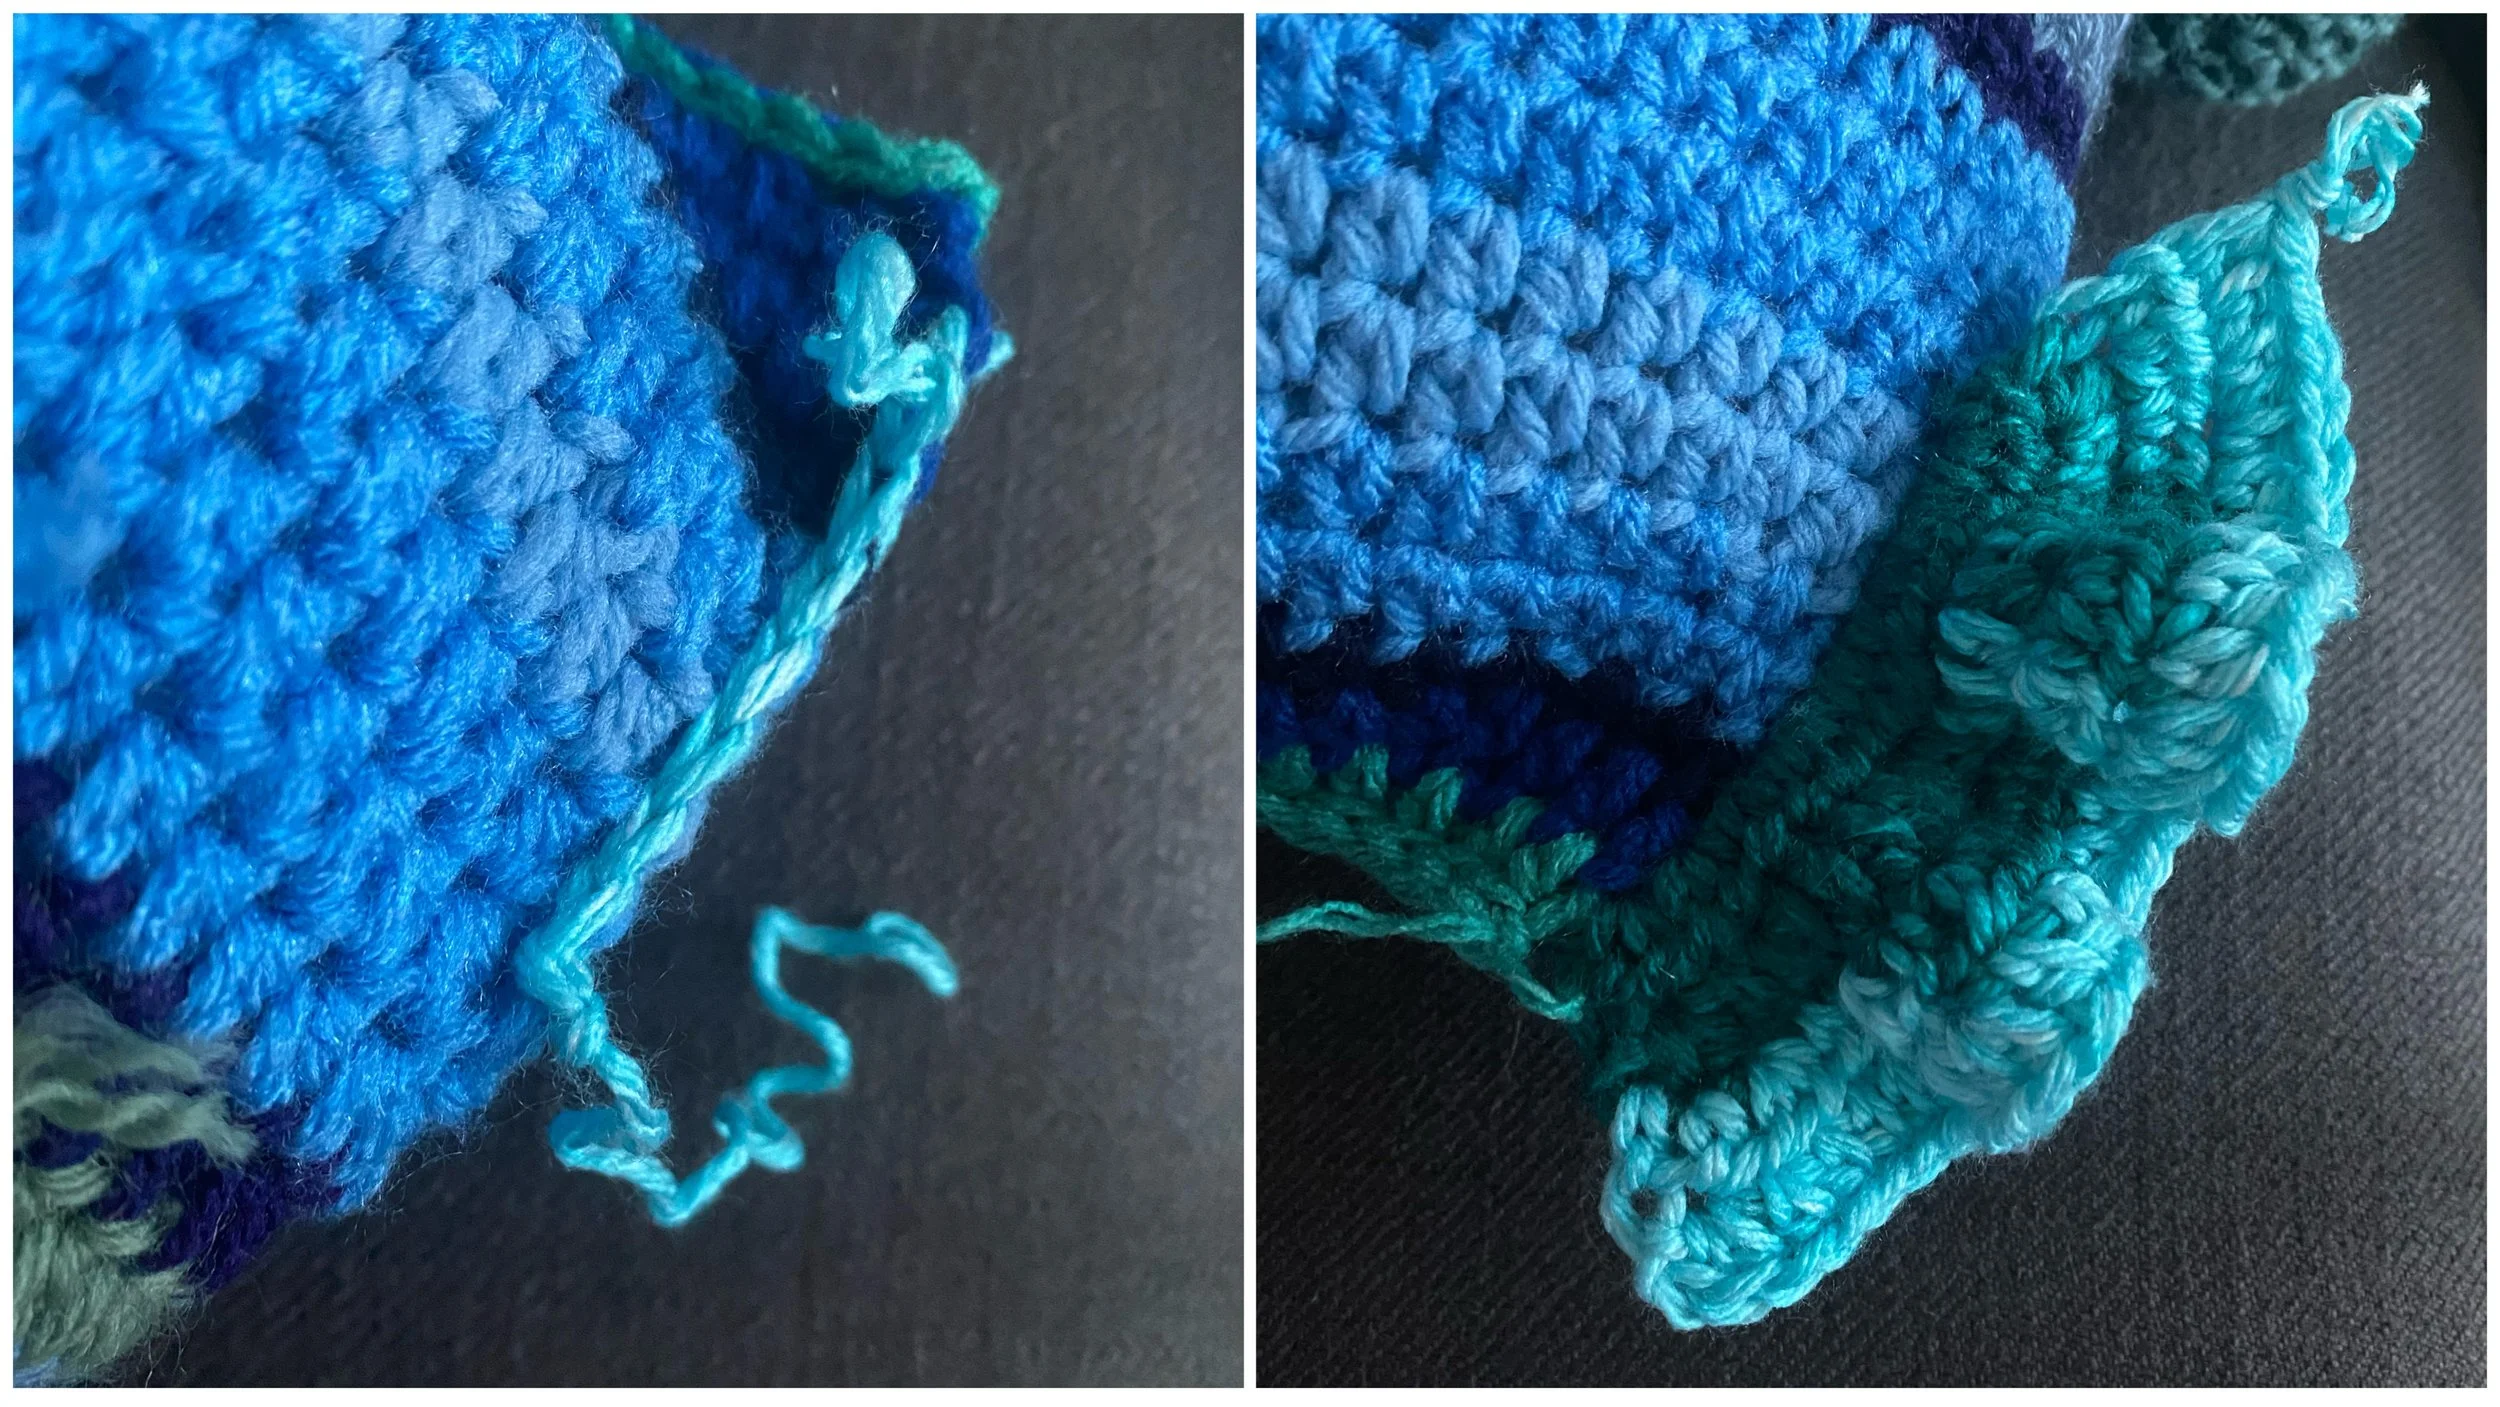
FINS:
slip stitch into the sides of the stitches on the top sides of the head, I worked into 8 stitches in this example
row 1: slip stitch into 8 stitches, with the front of the body facing you (8) chain 1, turn
row 2: hdc increase across (16) chain 1, turn
row 3: hdc increase, hdc into next stitch, repeat across (24) chain 1, turn
row 4: hdc increase, hdc into next 2 stitches, repeat across (32) chain 1, turn
row 5: hdc increase, hdc into next 3 stitches, repeat across (40)
[fasten off]
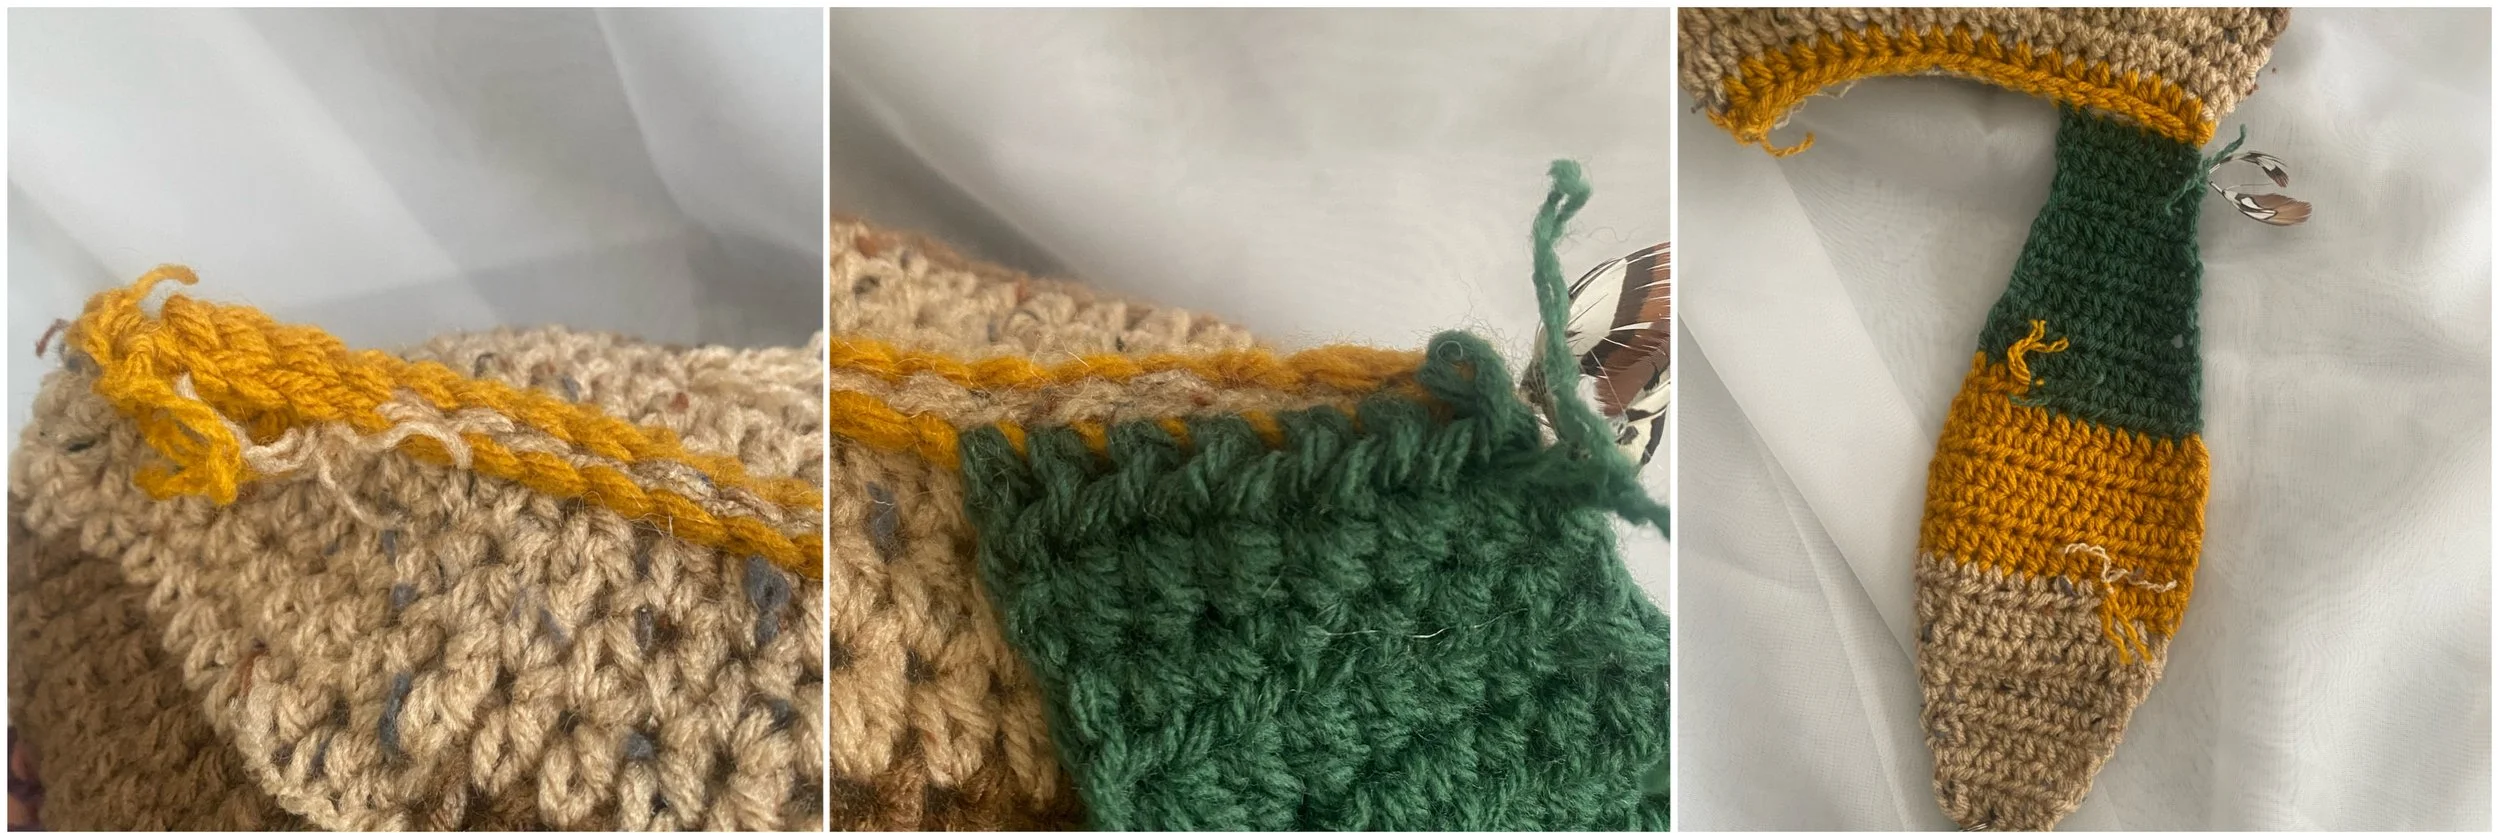
BUNNY EARS:
for each ear, hdc into the outer slip stitches on the top of the head, I started with 7 stitches in this example
row 1: hdc into 7 stitches, with the front of the body facing you (7) chain 1, turn
row 2-3: hdc across (7) chain 1, turn
row 4: increase, hdc into next 5 stitches, increase (9) chain 1, turn
row 5-6: hdc across (9) chain 1, turn
row 7: increase, hdc into next 7 stitches, increase (11) chain 1, turn
row 8-9: hdc across (11) chain 1, turn
row 10: increase, hdc into next 9 stitches, increase (13) chain 1, turn
row 11-15: hdc across (13) chain 1, turn
row 16: decrease, hdc into next 9 stitches, decrease (11) chain 1, turn
row 17: hdc across (11) chain 1, turn
row 18: decrease, hdc into next 7 stitches, decrease (9) chain 1, turn
row 19: hdc across (9) chain 1, turn
row 20: decrease, hdc into next 5 stitches, decrease (7) chain 1, turn
row 21: hdc across (7) chain 1, turn
row 22: decrease, hdc into next 3 stitches, decrease (5)
[fasten off]
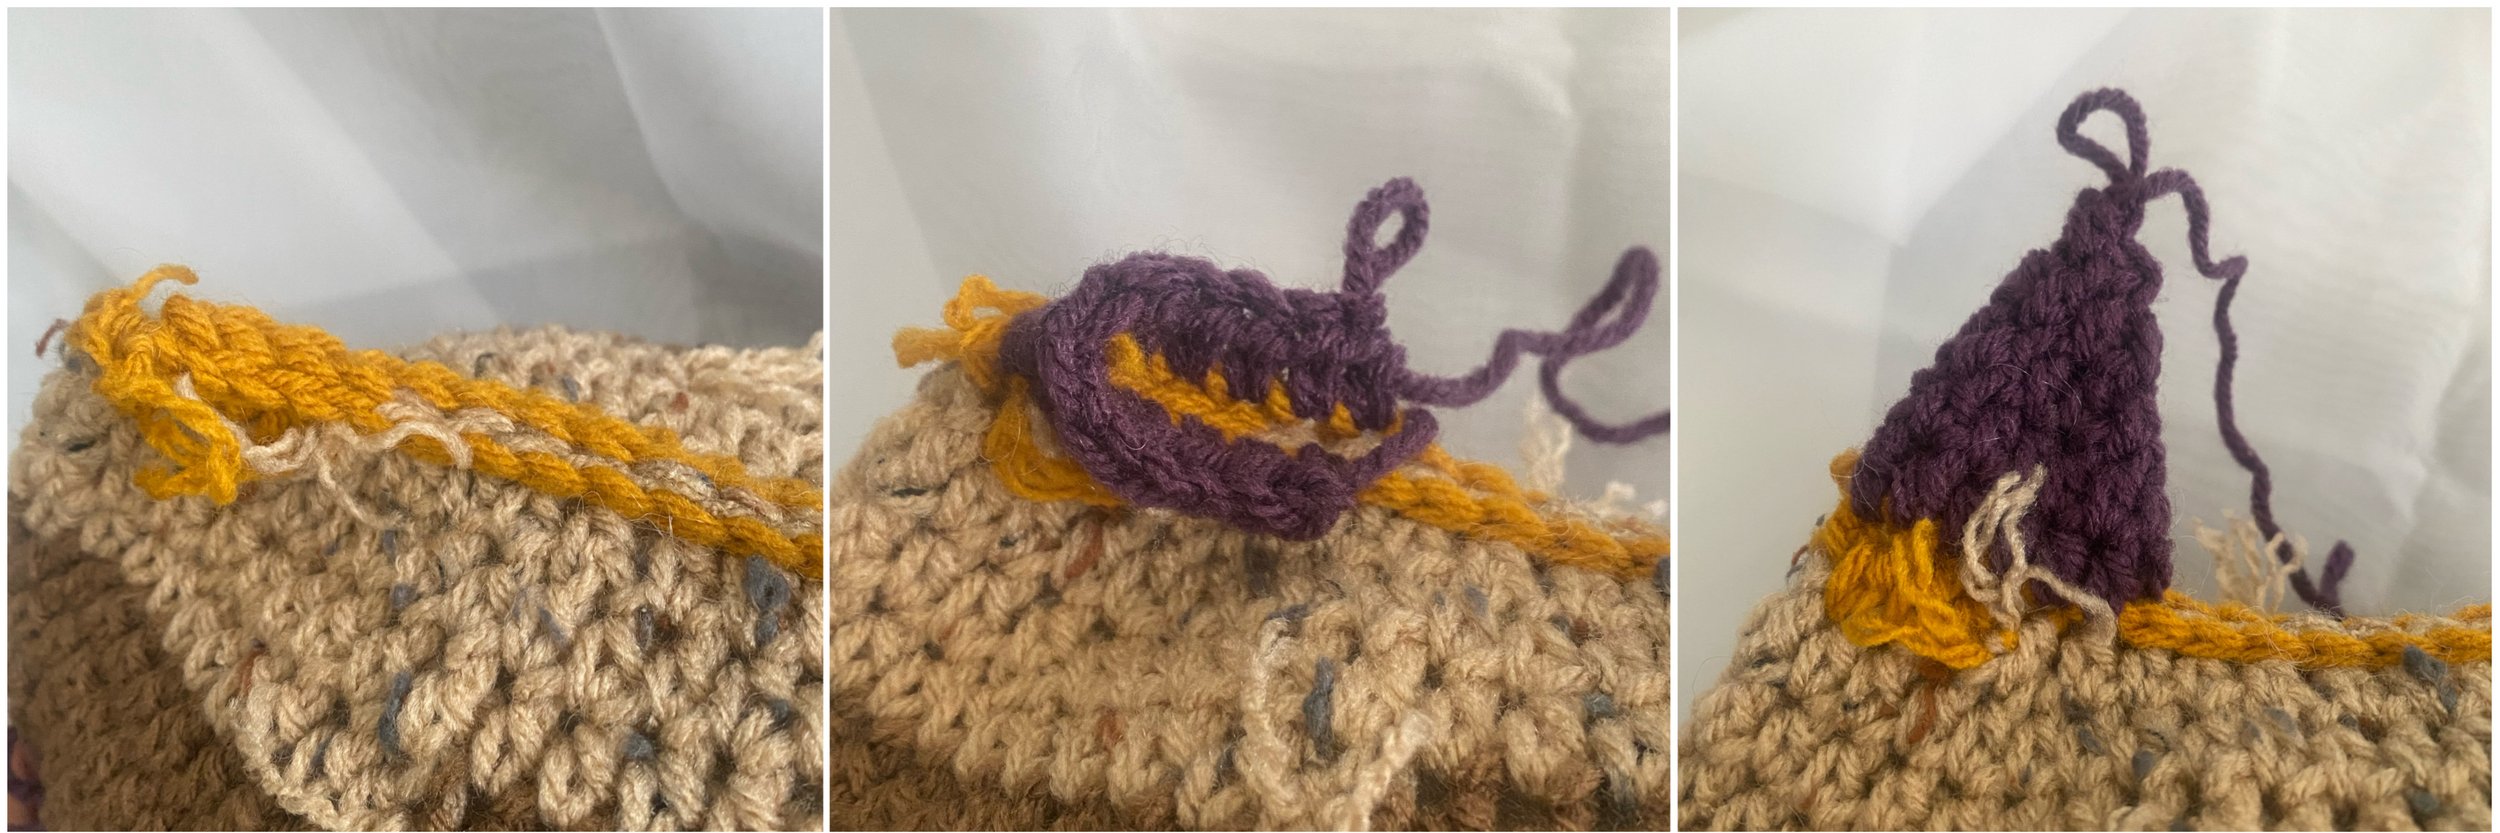
HORNS/CAT EARS:
working into the slip stitch row and the back of the last row, you will essentially be working in the round
round 1: for each horn, hdc into the 6 outer slip stitches on the top of the head, then turn and hdc into the 6 stitches on the previous round (12) keep working in continuous rounds
round 2: hdc around (12)
round 3: decrease, hdc into next 2, repeat around (9)
round 4: decrease, hdc into next, repeat around (6)
round 5: decrease around (3)
[fasten off]
♡