
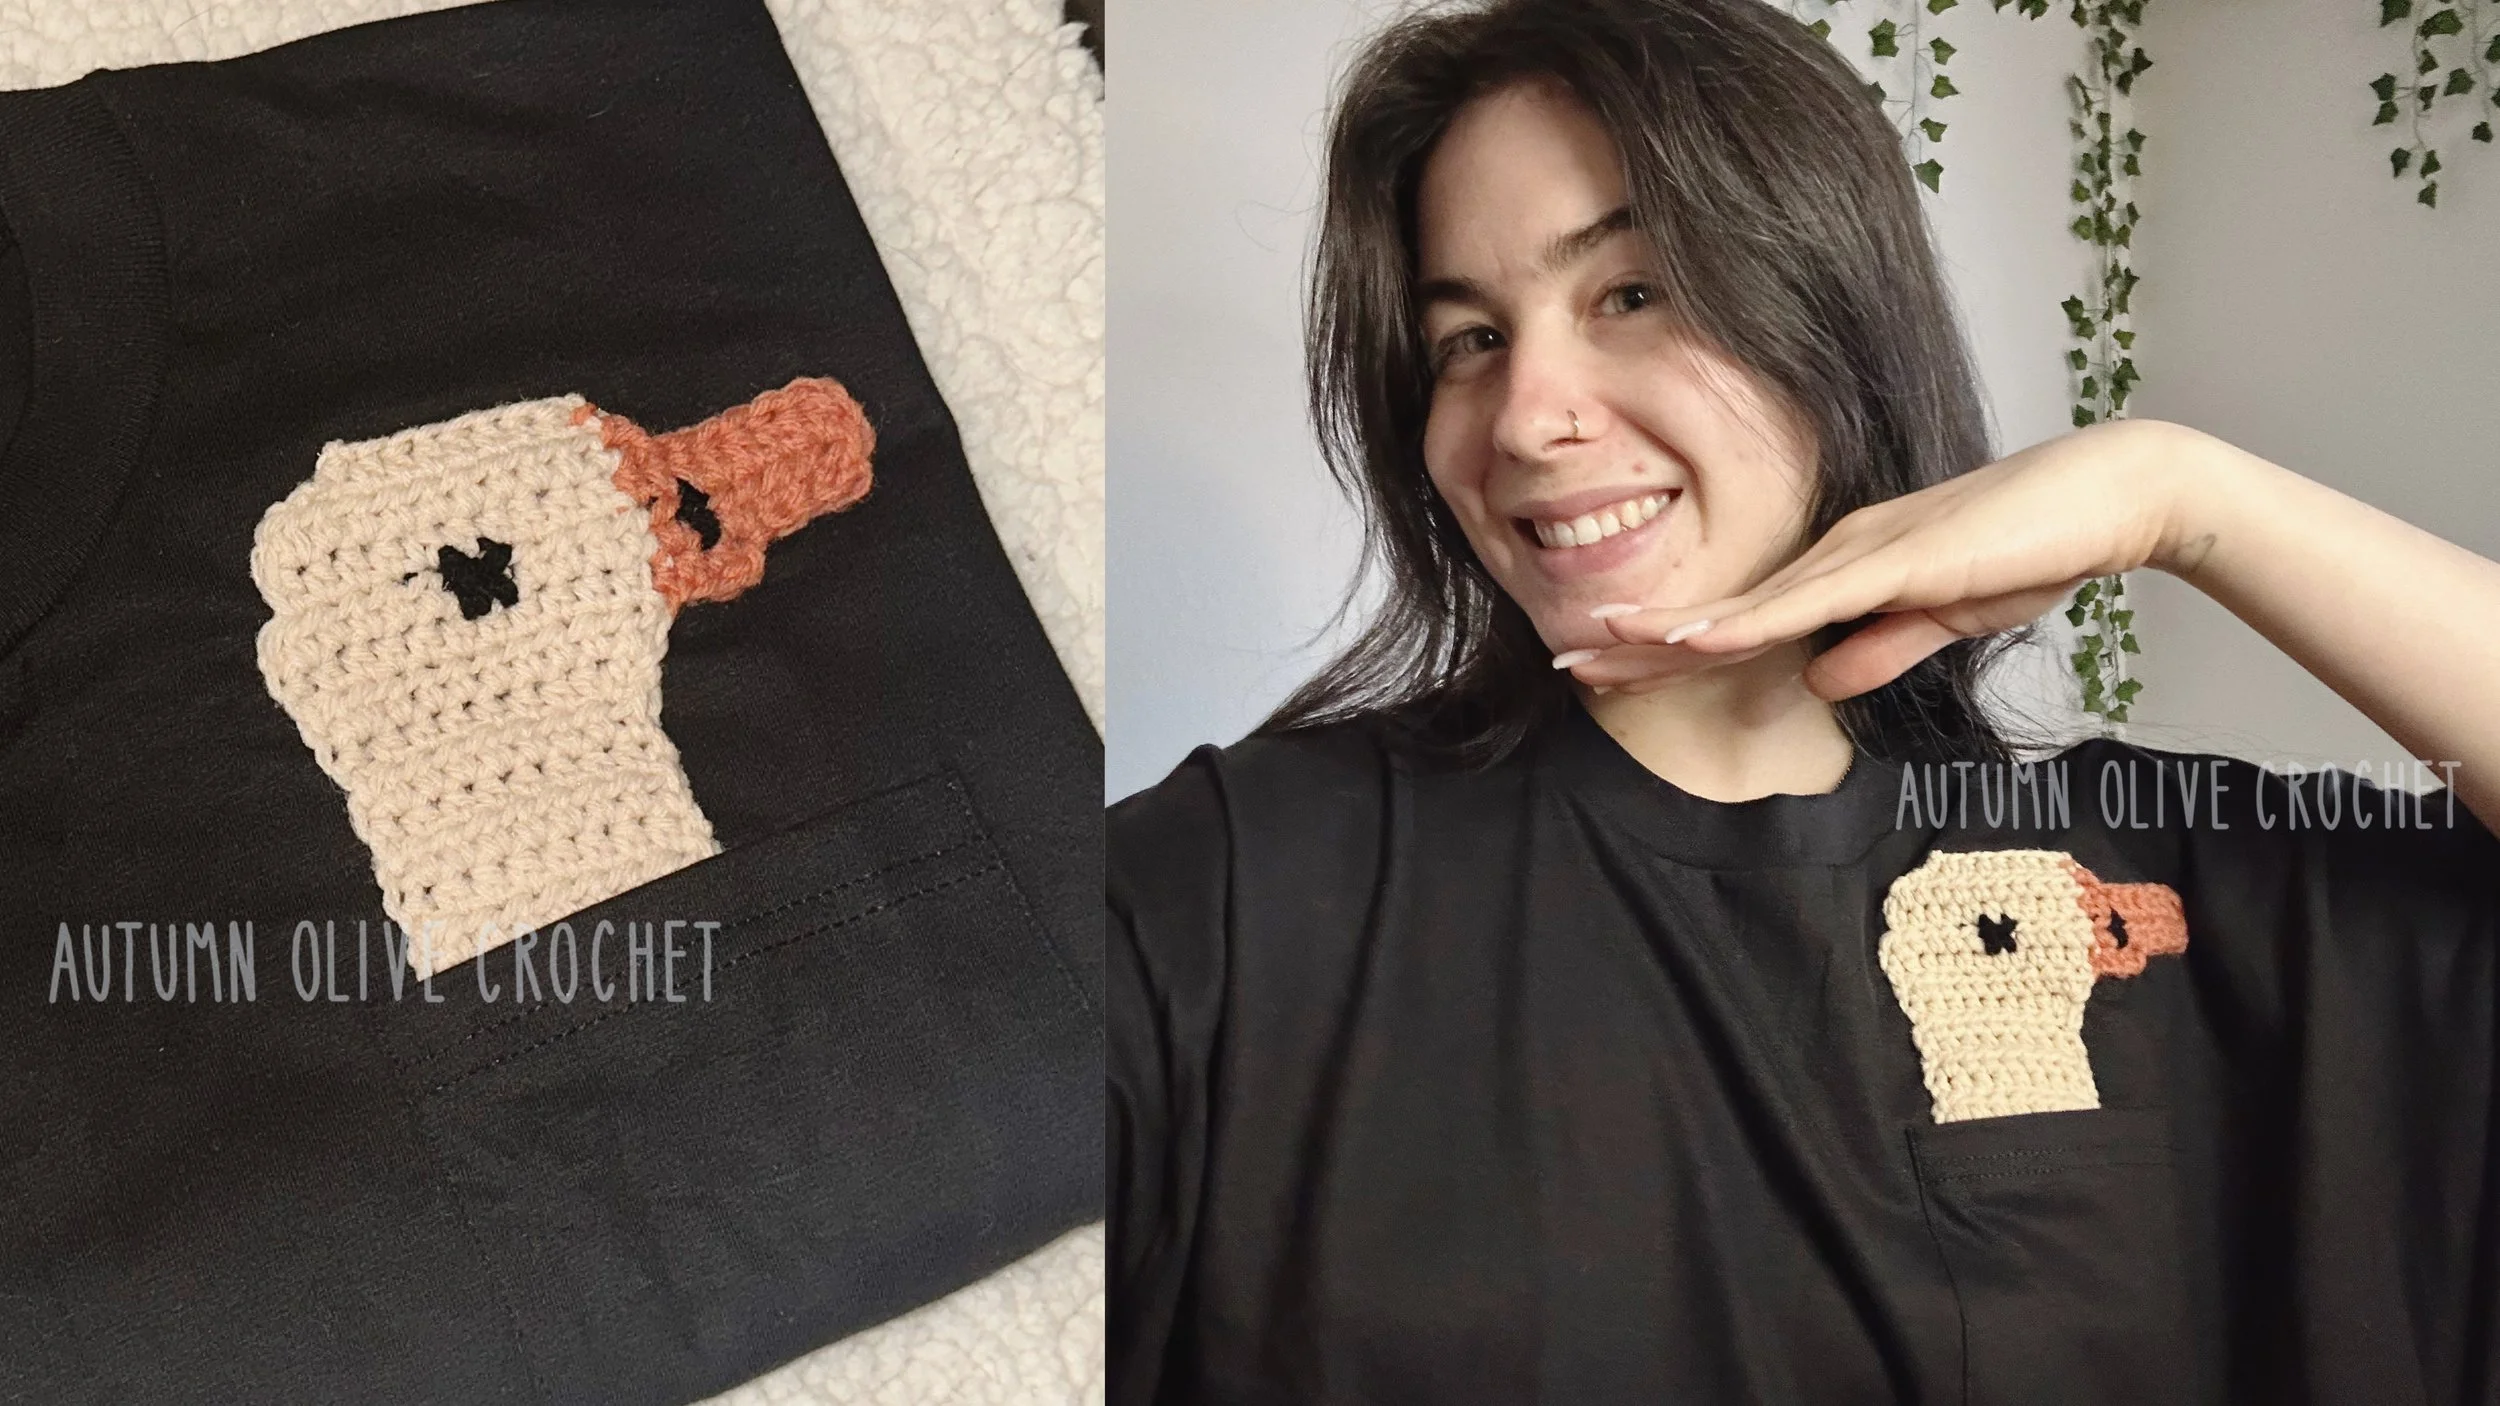
colorwork appliqué ♡
how to turn a colorwork grid into a stand-alone patch to be applied to a t-shirt, jacket, etc.
♡ by autumn olivia ward for autumn olive crochet
please do not sell, copy, or claim this text as your own
written in standard US crochet terms
you may sell items made using this idea! please credit me as the designer in your listings and include the link to this page
@autumnolivecrochet on all socials, tag me when you post your creations!
youtube tutorial ♡ https://youtu.be/RdewciqurqE
this idea was designed with my pocket species patterns series in mind ♡ also a great solution for:
a quicker/less laborious crochet garment
a cheaper garment to offer your customers
unique thrift flip/upcycle idea
scaling down designs to go on children’s clothes
wearing your favorite designs in a hotter climate
a more everyday/travel friendly way to wear your favorite designs
MY FREE GRAPHS YOU CAN USE FOR THIS PROJECT ♡
bunny face — https://www.autumnolive.com/free-patterns/bunny-graphic
citrus slice — https://www.autumnolive.com/free-patterns/citrus-city-crop-top
strawberry — https://www.autumnolive.com/free-patterns/strawberry-graphic

duck duck goose cardigans pattern has 25 birds to choose from ♡
MATERIALS ♡
4mm hook with size 4/medium/worsted weight yarn for standard 4.5” wide shirt pockets (the cardigan patterns use a 5mm hook for 5” pockets)
OR 3mm hook & size 3 yarn / 2mm hook & size 2 yarn for smaller or children’s shirt pockets
embroidery hoop — can be done without but it is very helpful for preventing fabric bunching up in the stitches
short sleeve shirt or long sleeve shirt with front pocket
optional: needle & thread for attaching appliqué if preferred
optional: pins or safety pins to hold the appliqué in place
NOTES ♡
be sure your fabric is pre-shrunk before attaching appliqué — wash/dry inside out
the more negative space in a design, such as a gap between two flowers or a long downward beak, the more separate pieces you will have to attach — consider something like the duck, pigeon, sunflowers or roses for a simple starting design
typically, a shirt pocket sits on the right side of a shirt and most of my pocket graphics are leaning to the right — if it makes sense for your design to have the graphic facing/leaning towards the center, you should follow the instructions in the pattern to mirror the graphic by working the orientation given as the wrong side
a needle and thread will make attaching the appliqué easier but using the working yarn means less materials and a perfect color match
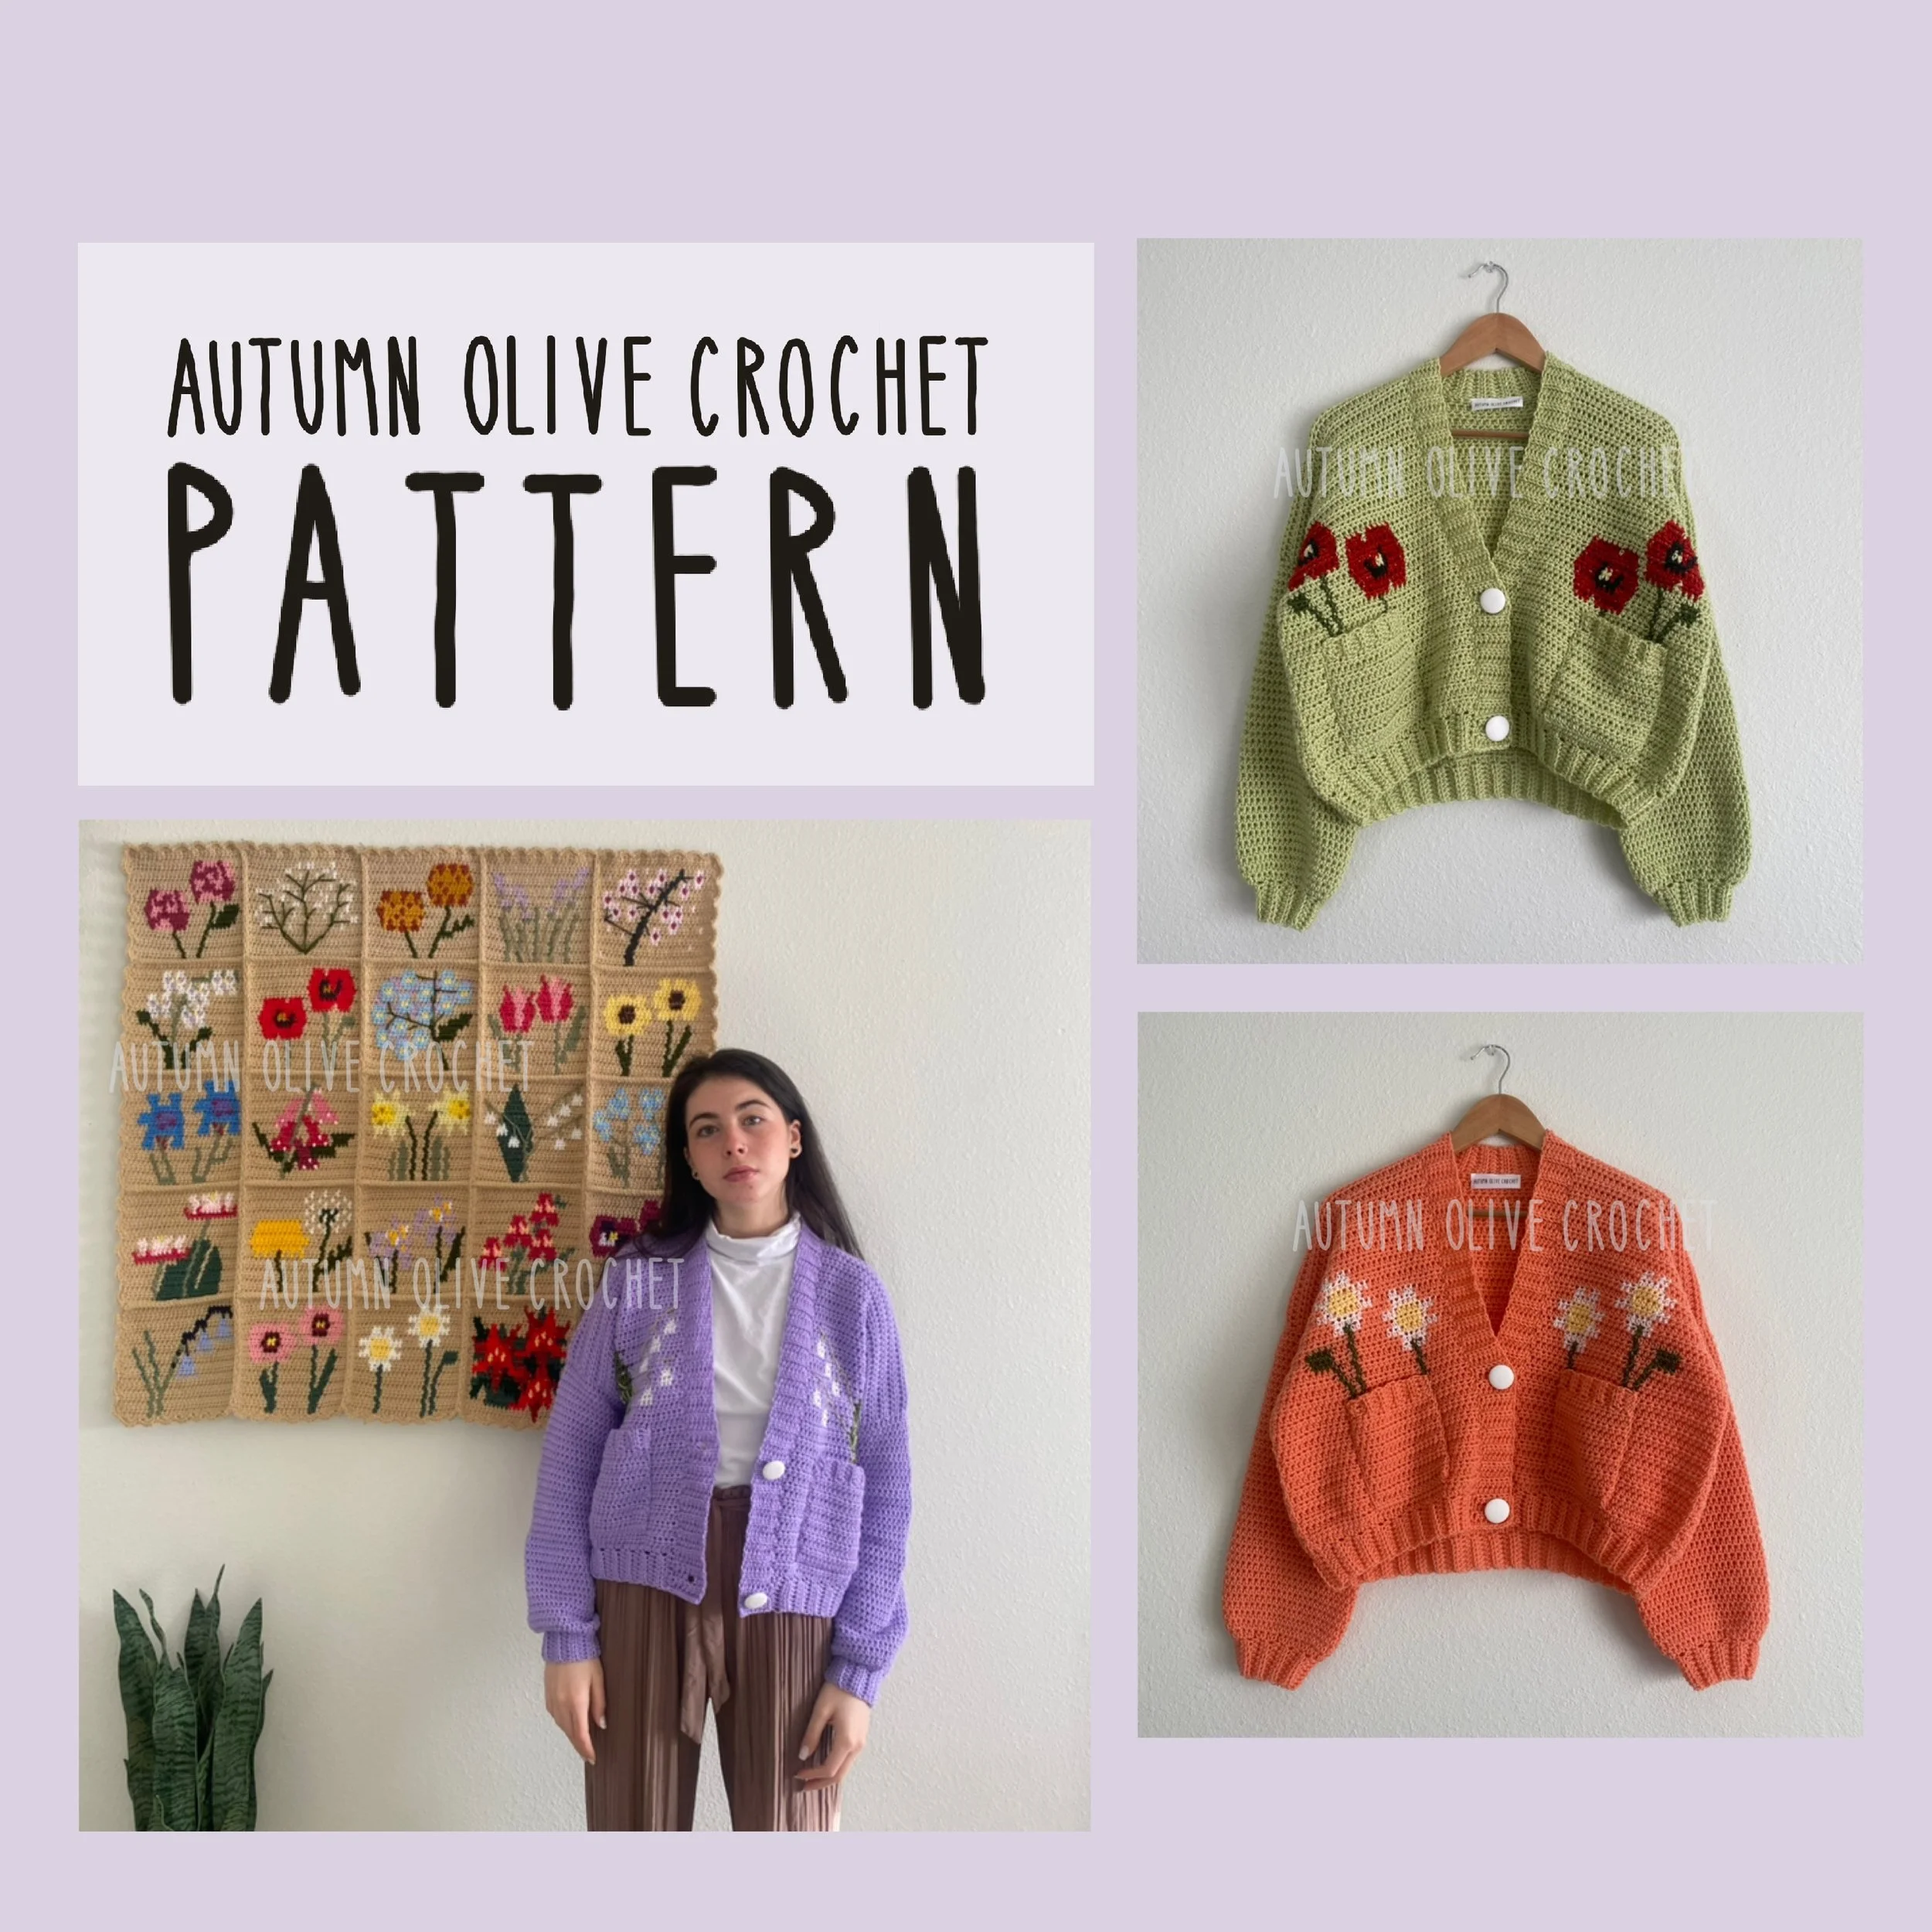
pocket full of posies cardigans pattern has 25 flowers to choose from ♡
INSTRUCTIONS ♡
start and end with long tails for seaming on every color that will be on the edges
when the graph starts with a wide and flat base, such as the bird necks: begin with a chain of the number of stitches shown + 1 more; work into the second chain from the hook to start row 1 (this is a good time to double check that it’ll fit in the pocket)
when the graph shows several separate pieces, they’ll need to be worked separately, such as: the flamingo beak needs to be started separate from the body but both can be incorporated together when the rows touch again / the duckling and his wings are started together but you will need to pull up a new loop for each part when they split into 3 / the lavender flowers and stems are all separate, same with the hydrangeas and cherry blossoms
when the graph shows several rows of a single stitch, such as on the poppy & daisy stems: work the bigger part of the graph first, then pull up a chain of twice as many rows shown and slip stitch back down the chain and fasten off behind the bigger part — for something like the bluebells with a curved stem, you don’t need to worry about the specific curves of the stitches, you will just work a chain + slip stitch and sew it on in the same curve
when the graph shows embroidery lines, such as on the lily of the valley thin stems: using your sharp yarn needle, add the same embroidery at the end
when the graph shows an X, such as the seeds in the sunflowers: these will be worked as french knots (wrapped 2 times)
when the graph shows 1-2 single stitches on their own, such as the baby’s breath flowers: these will be worked as french knots (wrapped 3 times)
FRENCH KNOTS — bring your needle and yarn up completely from the fabric in the area where you would like the knot to be; working close to the fabric, wrap the yarn OVER the needle 2-3 times, push the needle down into the fabric a few millimeters above where you came up; go slow and make sure the yarn doesn’t get tangled on its way through
when the graph has 1 or 2 more stitches on the next row, such as a slight rounding of a birds head: work hdc increases
when the graph has over 2 more stitches on the next row, such as a protruding beak: either end with a chain on the current row to use for the next row if that’ll be the first thing you come to, or work a foundation hdc for however many stitches needed if it’ll be the last thing you come to
FOUNDATION HDC — to begin, you will either start in the same loop you last worked into or into the first of 2 chains if you aren’t adding it onto something: yarn over, insert hook into specified loop, pull up a loop (this loop represents the “foundation chain”), yarn over, pull through foundation chain loop only (with plenty of slack), yarn over, pull through all 3 loops (hdc complete)
for the next one: yarn over, insert hook into the V of that last foundation chain, pull up a loop (this loop represents the next “foundation chain”), and repeat from this point on the last stitch
when the graph has 1 or 2 fewer stitches on the next row, such as a slight rounding down of a birds head: work hdc decreases into either the front loops only or the back loops only, whichever are on the face of your work
when the graph has more than than 2 fewer stitches on the next row, such as a drastic rounding down of a birds head: either slip stitch until the next hdc if that’ll be the first thing you come to, or simply stop the row at however many stitches needed if it’ll be the last thing you come to
ATTACHING APPLIQUÉ ♡
place the embroidery hoop on the fabric and tuck the appliqué into the pocket so that it is a few rows deep (but not so deep that you can’t access the bottom of it)
using the tails or a new needle and thread, you will attach the appliqué by going down into a stitch/row and through the fabric and then back up the through the fabric and out of the next stitch
continue around — when you get to the end of your yarn or the end of your current color, bring it up through the fabric at the edge of the appliqué, loop it through the edge of the appliqué to knot it and then weave the tail into the back of the appliqué and cut it off (if its the very last tail you’re weaving in, you can pull it with a little tension at the end and cut it off through the face of the appliqué, when you stretch it a little bit, it should retract inside the appliqué and be hidden)
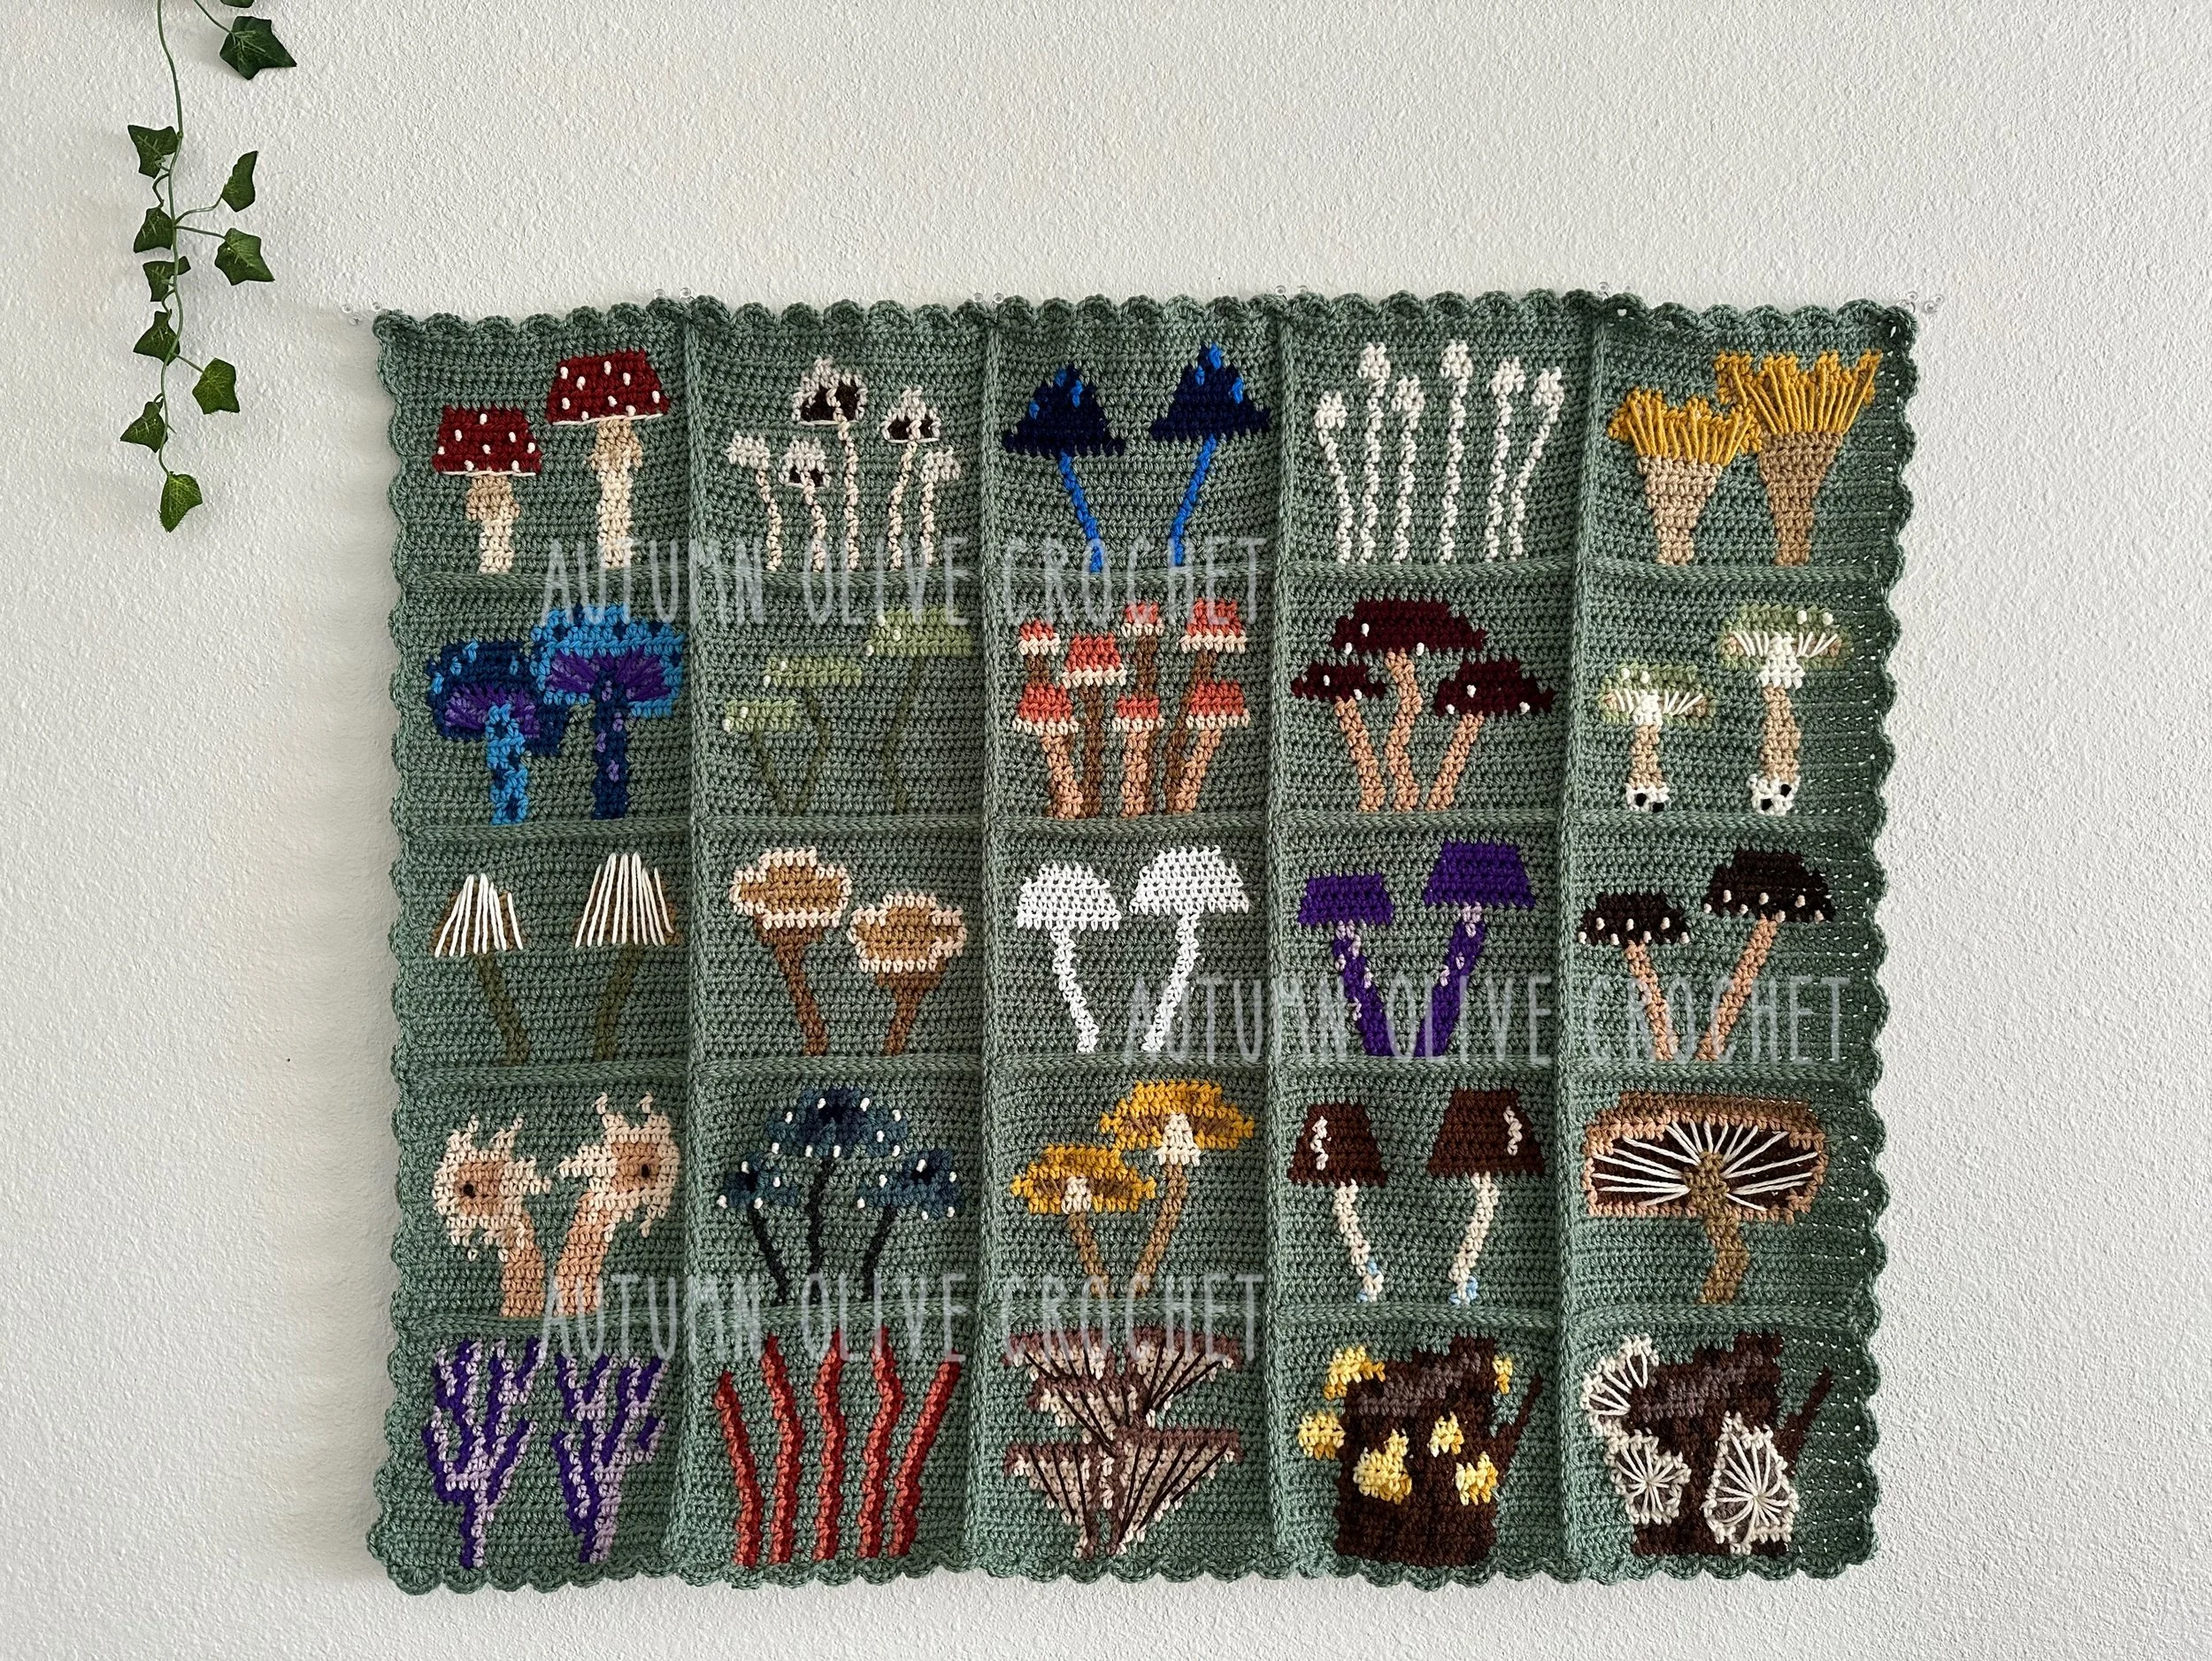
oh my fungi cardigans pattern